LaTeX Typesetting
Home Page | News and Updates | Course Details | External Links | Contact
LaTeX makes typesetting equations and including mathematical expressions in text very convenient. LaTeX is the preferred language for submitting papers to journals, including proposals for funding and award applications, preparing a thesis project and for third and fourth year undergraduate physics lab projects. Unfortunately, the LaTeX typesetting environment can be difficult to learn. In this course I want to stress the value of this software as a tool, and I am happy to assist in understanding it when problems come up. Before proceeding, make sure you can view .pdf files on your computer! To do this you need a pdf reader. At present Acrobat Reader is probably the most widely used but there are a huge variety that exist and can be chosen to your taste.
Part 1: Basic LaTeX Installation in Windows 10
LaTeX is a collection of utilities for processing specially prepared document files with a file extension .tex, which contain control statements that tell the processing utilities how to typset the document. To begin, you first need to put an installation of LaTeX on your system. If you are using Linux or Windows 10, a convenient package to do this is called MiKTeX, which is available here:
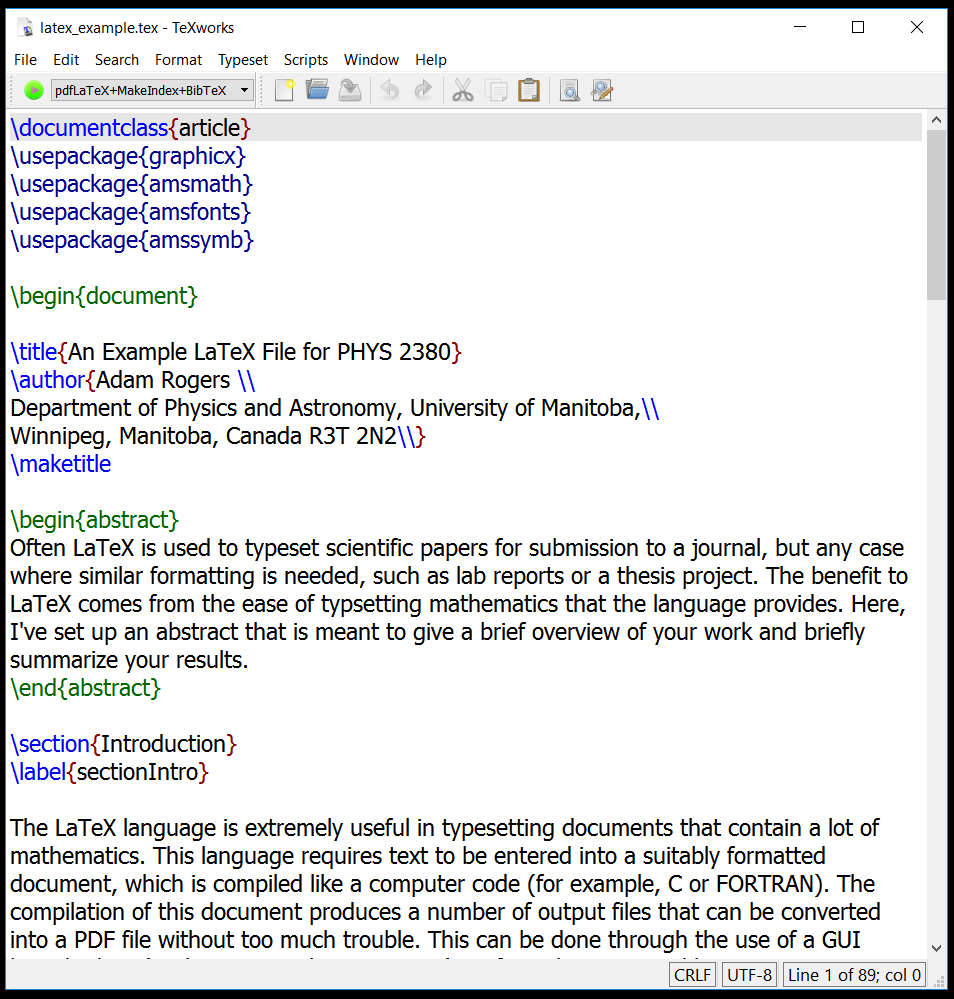
This is really all you need to begin using LaTeX, and you can make your own documents using any text editor (such as Windows Notepad). Once it is installed, MiKTeX includes a great editor for Windows called TeXWorks. This editor is preconfigured to work with MiKTeX, and should work in the Windows environment "right out of the box". A screenshot is shown below with the example_latex.tex that you can download below.

All LaTeX files require commands to be given in the .tex file. These commands tell MiKTeX how to set up and typset a document. Some of these commands can be seen above, such as the \usepackage{} commands at the top of the .tex file. Each .tex file needs to have these in place to compile properly. Note also the \section{} and \label{} commands. These will set up a nice looking title for the Introduction section that you can easily refer to later in the text.
To compile the document and produce a .pdf file in TeXWorks, select "pdfLaTeX" from the drop down menu in the upper left-hand corner of the screen. Make sure that you use just the pdfLaTeX option, as there are a few others that combine pdfLaTeX with other utilities that are not necessary for this example. Once the pdfLaTeX option is selected, just press the big green button. This will produce a .pdf file from the commands given in the .tex file. Note that you will have to do this a few times, LaTeX ususally requires a few passes to get all of the details in place in the .pdf. If you examine the document after only a single pass, you may notice some of your references missing or replaced with questions marks. This will not happen if you press the green button repeatedly. The pdf file that is produced will have all references, mathematical formatting and tables in place and produce a professional looking typeset document. If the pdf file opens after you run pdfLaTex in TeXWorks, then congratulations - you can use LaTeX.
The example LaTeX file shown in the TeXWorks screenshot above is available for download below, including an example image (in .png format) bundled together in a .zip file. To download this file, right click and choose "save as" or "save target as", and put it in a folder of your choosing. Then, once the download is complete, right click on the .zip file in Windows and select "Extract here". This will extract the .tex and .png files into the same folder then just double click the .tex file and the TeXWorks window should open pretty much just as it looks above. I also include the compiled .pdf result below as well, so you can compare the LaTeX commands in the .tex file with the results in the output.
The example .tex and image files in a .zip
and
Now that you have some idea of how to compile a document, the next step will be for you to write your own. To get started quickly, you can modify the example above easily by just removing the text that you don't want and replacing it with your own and keeping the formatting commands in place. There are a number of great resources online that can tell you how to set up tables, and format documents. A great guide to symbols is Julie Mitchell's "Basic LaTeX", which can be found below in .pdf format. This guide will show you what LaTeX commands can be used to set up integrals and other mathematical expressions, and the results when the file is compiled to pdf as well.
Part 2: Advanced Installation using WinEDT
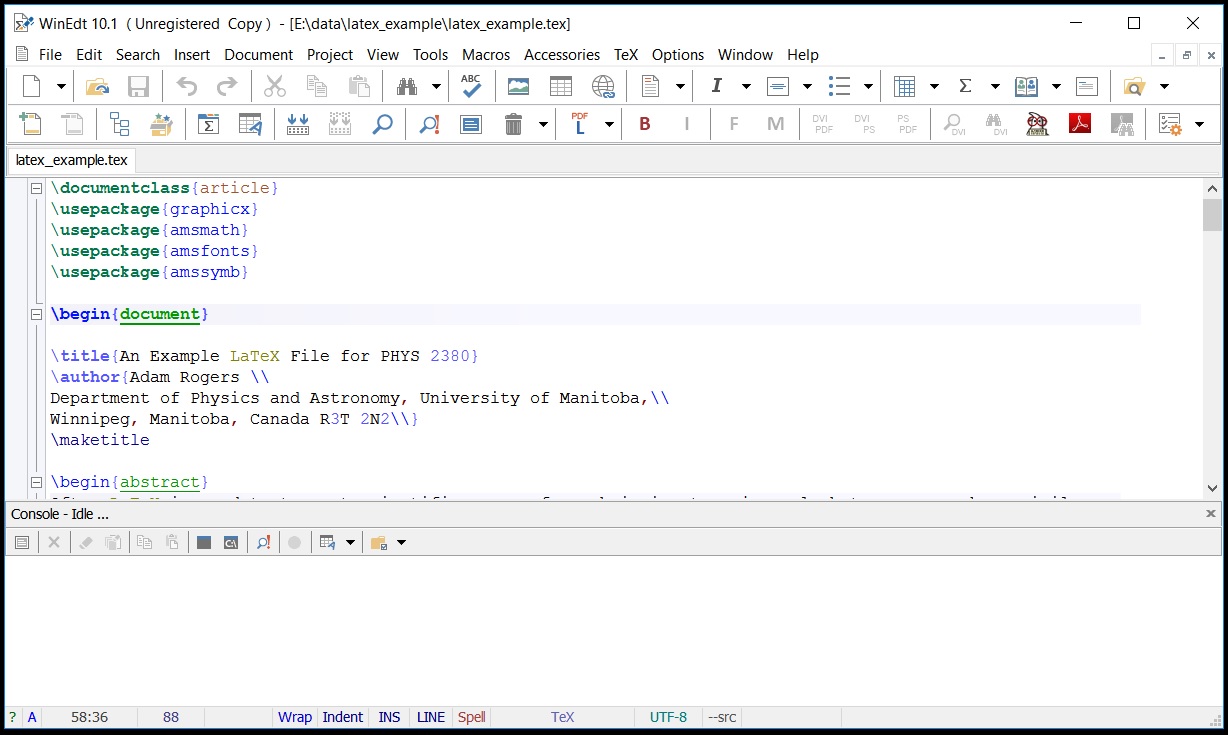
There are many other options that are available in MiKTeX than are shown with the TeXWorks editor, including a huge variety of LaTeX routines. Sometimes, depending on the details of the manuscript - especially if you need to use high quality graphics files - the TeXWorks editor may not cut it. In that case, you will need to install a more powerful and versatile TeX editor. One of the most popular graphical editors is called WinEDT, also shown in a snapshot below:

Once a document is created or opened in this editor, you will need to run pdfLatex on the document. You can do this by selecting the pdfLatex option on the pull-down menu next to the blue "L" button on the bottom row, or through the "TeX" menu. This will compile the .tex file and include the .png image, and simultaneously produce a PDF file. For our example there will be no obvious difference between WinEDT and TeXWorks. However, for the next section of this tutorial, WinEDT is required.
Part 3: Advanced options using figures with vector graphics
For advanced LaTeX users, you may also want to note some additional important and useful utilities for manipulating .eps graphics files in .tex files. The advantage to .eps files are that they are vectorized and have infinite resolution (no matter how much you zoom in, images made with vector graphics will not pixelize). Many types of software such as Matlab and Mathematica can produce vector graphics images, and these are required for including graphs in any published manuscript. The useful utilities for these files are the Ghostscript interpreter and the GSView interface. These utilities will allow you to manipulate and include .eps and .pdf figures easily in your LaTeX documents.
To use .eps files, first install Ghostscript from the link below:
Ghostscript 9.20 interpreter for PostScript and PDF
Then install the GSview GUI:
GSview v5.0, a useful Ghostscript interface
You will then be able to open .eps files with a double click and see the properties of these files. When compiling LaTeX with .eps images, select "latex" from the drop down "L" button (bottom row) or the TeX menu. Then use DVIPDF to produce a .pdf file like the one above. This will keep all the formatting but will allow you to compile your LaTeX document with an .eps file.